Connecting peripheral hardware devices (barcode readers, receipt printers, patron imaging cameras and signature pads) to function within Symphony WorkFlows.
Barcode scanners
- Barcode scanners are plug-and-play devices. Once connected, Windows should recognize and configure USB scanners automatically.
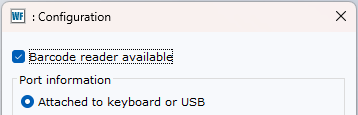
- Within WorkFlows, open Preference>Peripherals>Barcode Reader from the menu bar and check the 'Barcode reader available' box.
-
(Optional Honeywell scanner configuration)
SWAN recommends the following scanner settings for optimal use in WorkFlows. Scan each programming barcode once from top to bottom. No need to print this page – the scanners can read the on-screen barcodes. These may also be used for troubleshooting scanner behavior.
I. This barcode will reset the scanner to factory defaults. This ensures that it can correctly decode our barcode format as well as clear any unwanted settings.
II. This barcode will activate the scanner when an item is passed beneath the scanner, eliminating the need to directly interact with the scanner.

III. this barcode adds a carriage return (CR). Adding the carriage return will automatically ‘enter’ the scanned barcode into WorkFlows.

Patron imaging cameras
Webcams can be used to capture patron images to associate with WorkFlows users. Start by connecting the webcam to your computer and allowing Windows to install drivers automatically.WorkFlows will then automatically detect any Windows-connected cameras. When using a camera, the device must be connected to the system prior to launching WorkFlows.
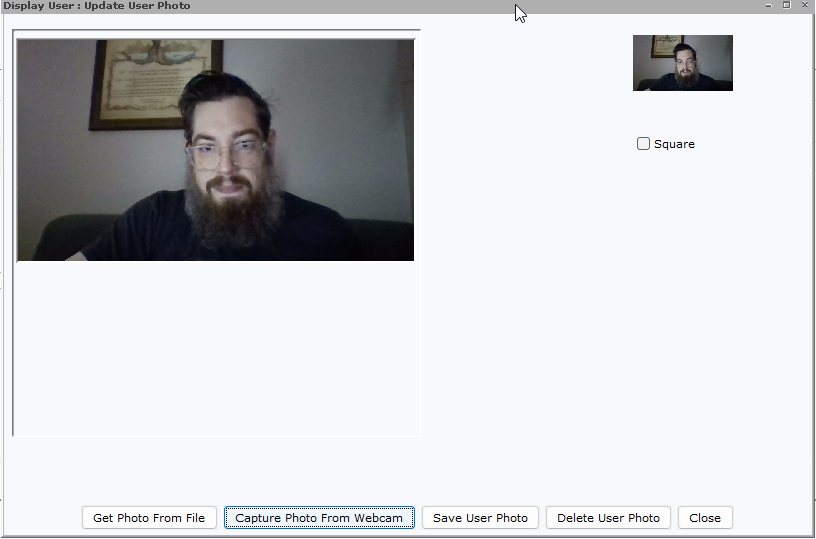
To test your camera or add a user photo:
- Use the Modify User tool and click the silhouette to the left of the user's name and ID.
- Select 'Capture Photo From Webcam'. This will open the camera.
- You can use the 'Square' option and the cropping arrows to crop the photo to better fit the user's face in the box.
- After the photo has been taken, select 'Save User Photo'.
Patron signature pads
The WorkFlows MSI installer provided by SWAN includes the necessary drivers to enable the Topaz signature pad. These drivers are proprietary to SirsiDynix WorkFlows, so manufacturer drivers will not work in this instance. A Standalone Driver is available for troubleshooting purposes.
After installing WorkFlows using the SWAN installer, no further software installation is required to use the signature pad in WorkFlows.
*Please note: If your library is using signature pads for the first time, please open a ticket so SWAN staff can make the necessary adjustments to enable signatures.*
To test your signature pad or create a user signature:
- Ensure your signature pad is connected to your system before launching WorkFlows in order for the client to recognize the device.
- Within 'Modify User', click the 'User Signature' button. This will open the capture signature tool.

- From within the capture signature tool, choose 'Capture Signature From Pad'. This will open the signature monitor. From here, you can see the patron reading and agreeing to the user agreement as well as seeing the user signing the pad.
- Once the patron has finished signing, the signature monitor will close and you may choose "Save User Signature'.
