Acquisitions EDI ordering
EDI Ordering allows you to send both orders created manually and those created with 9XX to vendors electronically. Open a ticket with SWAN support to assist you in the setup of this process. We will ensure all settings for EDI are correct and will provide you with the necessary report templates.
- Contact your vendor to make sure they can support EDI (most larger vendors support it). Ask them for:
- any information that is specific to them.
- the settings needed to fill in the EDI Address tab in your vendor record(s)
- Set up the EDI Address tab in your vendor record(s), these fields must be filled out exactly as shown in the information your vendor provides you. SWAN will assist you with the setup of these fields if your vendor gives you incomplete information.
Once you finish the setup you are ready to start using EDI for sending orders and receiving invoices.
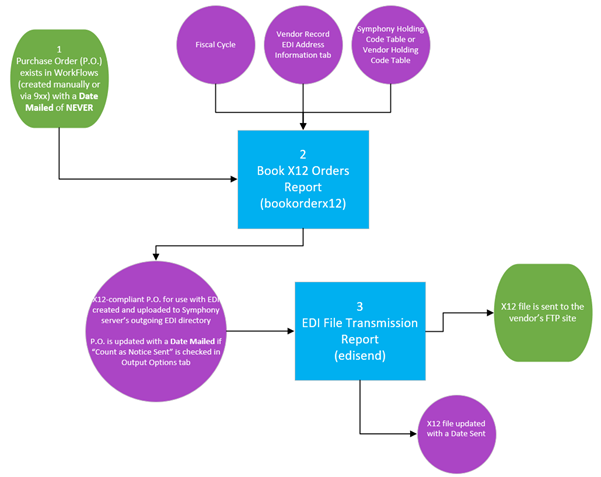
Book X12 Orders report
This report selects orders to send to your EDI vendors and prepares them for EDI transmission.
Orders, either created manually or by using the 9xx process, are selected by the report if the following is true:
- The orders are linked to a vendor configured for EDI
- The orders have a Date Mailed of NEVER
The following steps walk you through how to configure the report. While you can run the Book X12 Orders report ad hoc, we recommend scheduling the report to run at the end of the day so it will automatically process all new EDI orders.
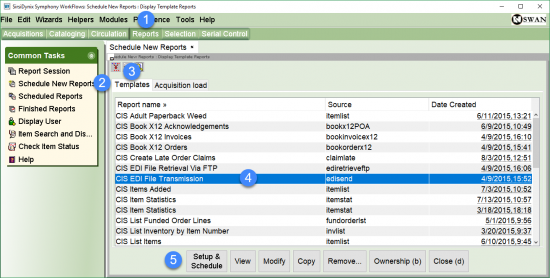
- Go to the Reports Module.
- Click on Schedule New Report.
- Click on the Templates tab.
- Select the XXX Book X12 Orders report template for your library (The XXX is replaced with your 3-letter library code.)
- Click Setup & Schedule.
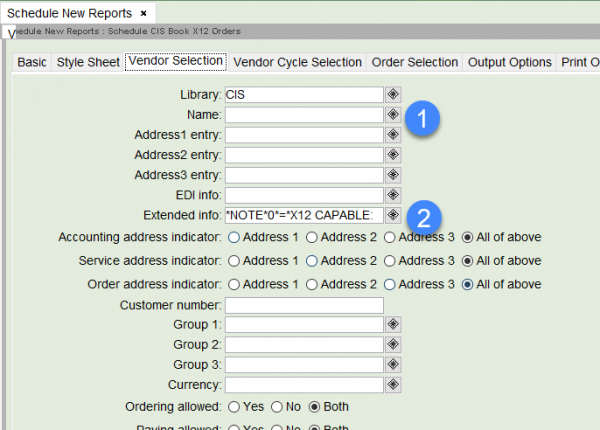
Vendor Selection tab
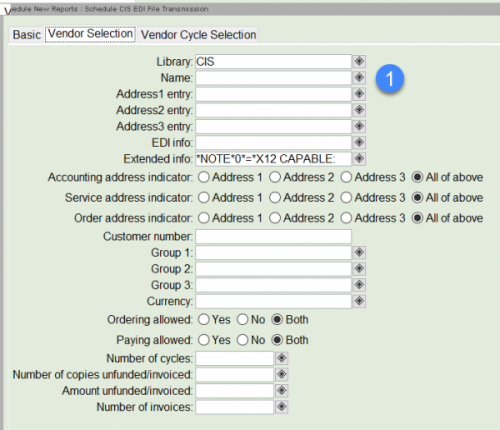
- Leave the vendor name blank to allow the report to prepare all existing purchase orders.
- Do not change the Extended info field, this is how the report is able to select your EDI vendors.
Note: do not remove the information from the Extended info field.
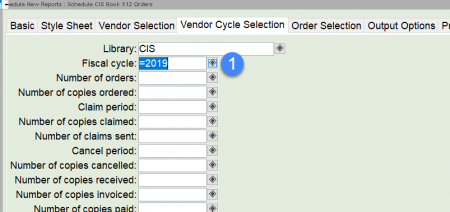
Vendor Cycle tab
- Use the gadget to enter the current Fiscal cycle.
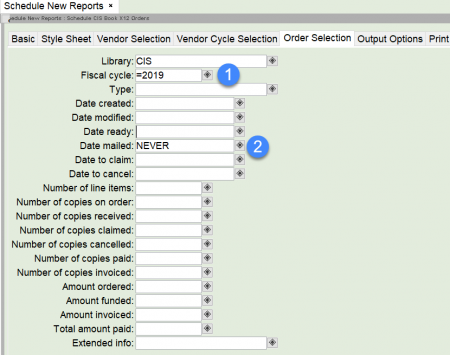
Order Selection tab
- Use the gadget to enter your current Fiscal cycle.
- Make sure the Date mailed is NEVER.
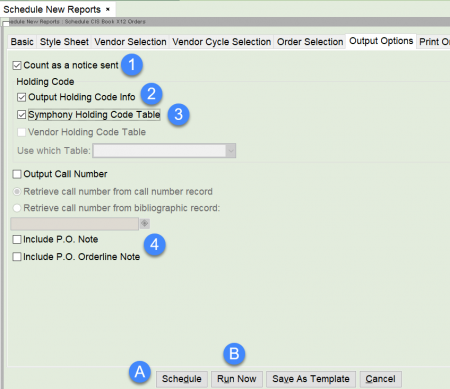
Output Options tab
- Make sure the Count as a notice sent box is checked. This ensures the order will be updated with a Date Mailed.
- Check the Output Holding Code Info box.
- Check the Symphony Holding Code Table (most vendors). If your vendor is not able to accept the Symphony Holding Code Table, check the Vendor Holding Code Table, then select the correct table from the drop-down menu.
- Check the Include P.O. Note and/or Include P.O. Orderline Note if you want this information included in the order.
- If you would like to schedule the report to run at another time, click the Schedule button.
We recommend you schedule your report to run daily near the end of the work day.
- If you would like to run the report immediately, click the Run Now button.
EDI File Transmission report
This report sends your prepared orders to your vendors via FTP.
- Go to the Reports Module.
- Click on the Schedule New Reports wizard.
- Click on the Templates tab.
- Select the XXX EDI File Transmission report template for your library (The XXX is replaced with your 3-letter library code).
- Click Setup & Schedule.
Vendor Selection tab
- Leave the Vendor Name field blank to allow the report to select all vendors with the appropriate EDI and Extended info fields.
Note: Do not remove the information in the Extended Info field.
Vendor Cycle Selection tab
- Use the gadget to enter the correct Fiscal Cycle.
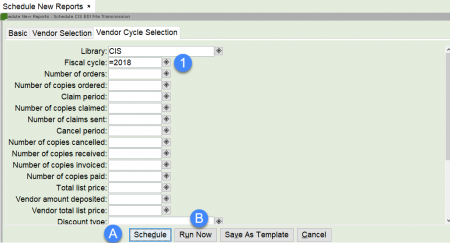
- If you would like to schedule the report to run at another time, click the Schedule button.
We recommend you schedule your report to run daily near the end of the work day, after the Book X12 Orders report runtime.
- If you would like to run the report immediately click the Run Now button.
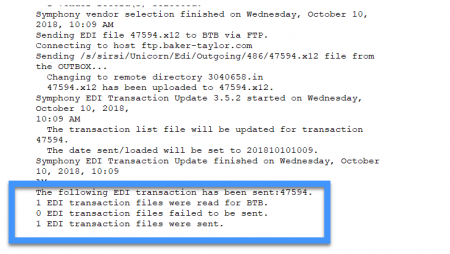
View the report in the Finished Reports wizard to ensure it ran without errors. A status of OK means it ran without errors. If the status is ERROR, contact SWAN for assistance in troubleshooting the error.
Viewing the finished report
- Go to the Reports Module.
- Click on the Finished Reports wizard.
- Select the EDI File Transmission report you ran.
- Click View.
- Click OK.
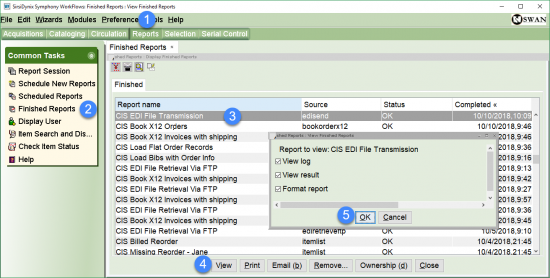
The report log opens in the program selected in your Session Settings.
Scroll to the bottom of the report to see how many files were sent.