Create invoices manually
Navigate to Staff > Acquisitions > Invoicing
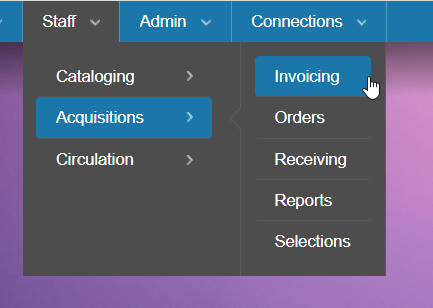
- Click the Create Invoice button.

- Fill out invoice fields:
- Invoice number
- Invoice date
- Vendor
- Vendor account
- Invoice amount (total)
- Invoice notes (if needed)
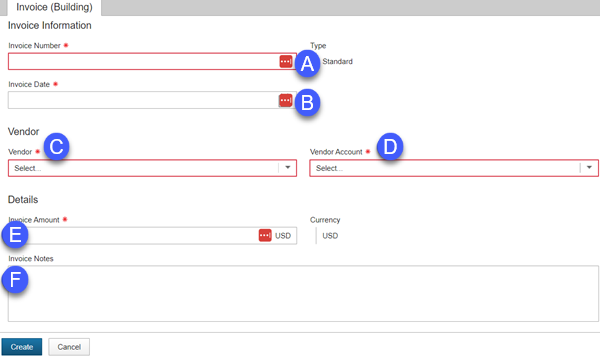
- Click Create.
- Enter the Order ID for the first invoice lines. Invoice lines can only be linked to order IDs at this time.
The order details will auto-populate.
Make adjustments to amounts or quantities to match the invoice.
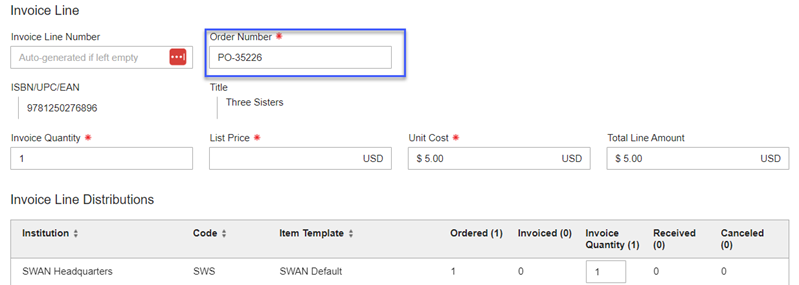
- Click Save.
- Click Add Invoice Line to continue adding invoice lines.
- Click Cancel to exit the invoice when you have finished adding all invoice lines.
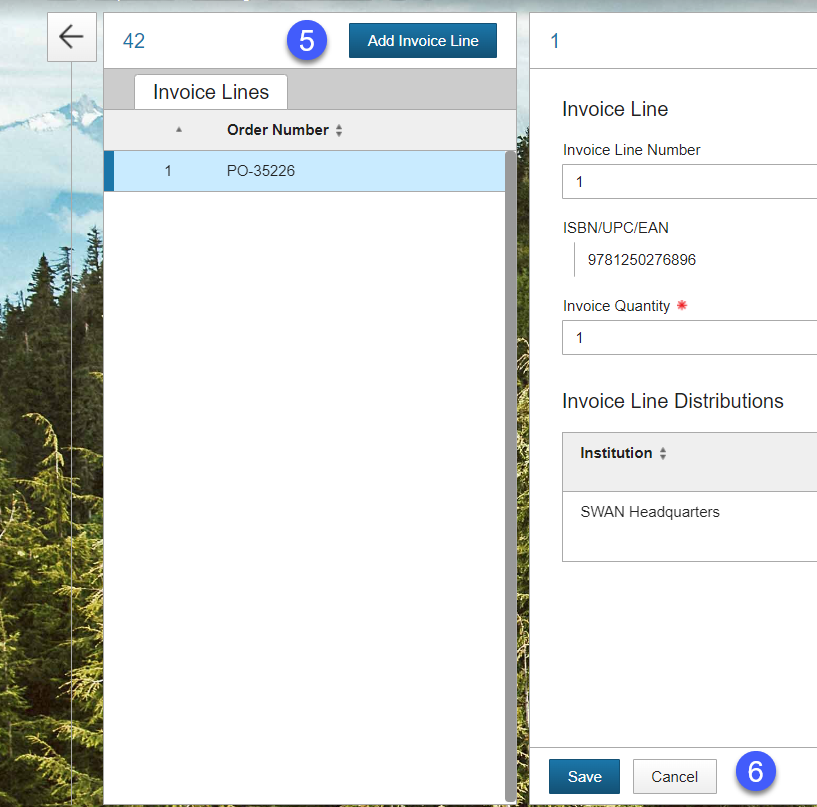
While an invoice status is Building, you can remove any invoice lines by clicking on the blue X in that line.

Import invoices
Invoices can only be imported from vendors that can provide them in an EDIFACT format. You must check with your vendors before attempting to import any invoices and verify that they can provide you files. You may also need to complete some configuration within your vendor's system.
Navigate to Staff > Acquisitions > Invoicing.

- Click the Import Invoices button.

- A list of previously imported invoices will appear. Click Import New File to import a new invoice.

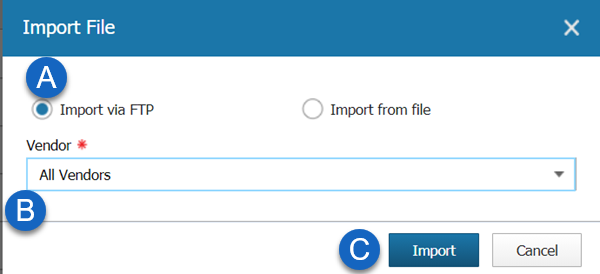
- Fill out fields for importing invoices.
-
Select Import via FTP if you have configured your BcAcq vendor records with an EDI entry for Remittance (invoices). BcAcq will connect to your vendor's FTP site and import an available invoice files automatically.
Select Import from file if your vendor has sent you an EDIFACT invoice file directly and there is no need to connect to their FTP site. If you select this option, you will need to use the Browse button to locate the file on your system.You will almost always select Import via FTP.
- Select a vendor from the vendor dropdown menu or leave All Vendors selected to import invoices from any vendor with an EDI entry for Remittance configured.
- Click the Import button.
-
- BcAcq will begin attempting to import any invoices found. The files will list with a status, depending upon whether the process was successful or not.
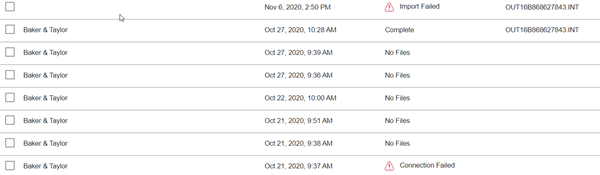
- To view an imported invoice, check the box next to any file with a status of Complete and click the View Imported Invoices button.
- The imported invoice(s) will display. Click on the Invoice Lines tab to see invoice line information.
